Cagri Hakan Zaman
zaman@mit.edu
In this tutorial, we will walk through the steps for placing 3D models in Unity Game Engine and viewing them in Augmented Reality (AR) using an Android or iOS device. In the past, we used Vuforia AR system for this purpose, but now both Android and iOS supports image tracking functionality by default, so we no longer need to use a third party package. Both Android (ARCore) and iOS (ARKit) has support for Unity, but there is a better alternative: ARFoundation. ARFoundation is a cross platform development kit that supports both Android and iOS subsystems. It makes it easier for us to develop a single application that can work in different devices. However, we still have to take some additional steps before deploying our applications to either iOS or Android devices.
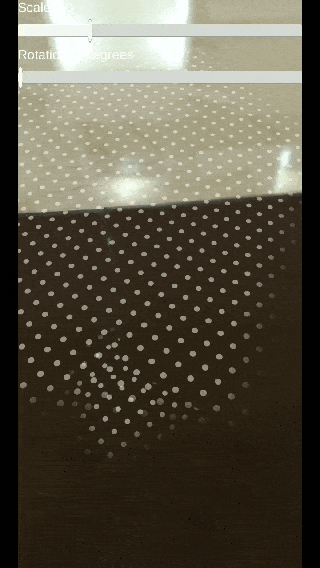
At the end of this tutorial your will learn how to place your models in AR in two different settings: Image Tracking and Plane Tracking. Image tracking will allow you to designate a target image to place your model onto. You will print your target image and your application will find and place the model on it. In Plane Tracking mode, you will place your model in real world surfaces. You will be able to scale and rotate your models in this mode. Below is how they will look:

Tutorial Outline:
Install Prerequisites
Setup Unity Project
Build Process (iOS)
Build Process (Android)
Importing and Preparing 3D Models
Using Image Tracking Template
Using Plane Tracking Template
For beginners, here are some resources for learning basic concepts about Unity, ARCore & ARKit:
You don’t need to know the details of these software packages to follow this tutorial, but it will be useful for your to familiarize yourself with them.
As a first step, follow the prerequisites section to install the necessary software:
Install Prerequisites
Download and install Unity Hub. You may need to create a user account at this point.
Launch Unity Hub. From Install > Add. Select Unity 2019.1.f7 (latest stable version) from the list. Note: Do not install any preview version ends with “a” or “b” as we cannot ensure their compatibility.
From the installation screen select Android Build Support or iOS Build Support. (Android Only) Important!: Click the arrow next to “Android Build Support” and select “Android SDK and NDK Tools” option as well. If you do so, you can skip step 4.
(Android / Optional) Download and install Android Studio. We will use it to download latest Android SDKs if necessary. Note: Installing Android SDK and NDK with Unity is the recommended way and much easier. Installing Android Studio will allow you to have an Android Development environment on your machine for advanced use cases.
(iOS) Download latest XCode from Appstore.
Setup Unity Project
This tutorial uses two sample scenes adopted from Unity AR Foundation samples. The templates are designed for minimal editing on your side, so you can quickly place and view your models in them.
Step 2. Select the correct version for your project and double click to launch.
Step 3: Go To Window > Package Manager to ensure you have the required plugins. The template should already have them.
Step 4: In Window > Build Settings, select your target platform and click Switch Platform. This will take a while. Then, click on Player Settings (bottom left)
Step 5: Change the package name to com.virtualxdesign.yourproject
Download the template file from https://github.com/virtualxdesign/artemplate (Click on Download as Zip). Extract the zip file.
Launch Unity Hub. From Projects> ADD (top right corner) select the folder you extracted. It should add the project to the “Projects” screen. Ideally you should have the same exact unity Version (2019.1.f7) installed on your computer. But in case you have a never version code (i.e. 2019.1.f8) you will see an orange exclamation mark under your project. Don’t worry. As long as you have a never version, everything should work as expected. From the drop down menu select your Unity Version and double click on your project to launch it.
The project window opens. You should already have ARFoundation enabled for your project, but in case something goes wrong you can enable it yourself. From Window>Package Manager open the package manager window. This window shows all the extensions available for your Unity project. You should see AR Foundation, ArCore XR Plugin, ARKit Face Tracking and ARKit XR plugins are installed. You may see a down arrow next to them, which indicates there is a newer version available. Do not update these plugins! If you already have the plugins with following version numbers you are all set. But if for some reason these packages are not installed, click on them and select the following versions from the drop down and click install for each:
Ar Foundation -> preview.3 - 2.1.0
ArCore XR Plugin -> preview.5 - 2.1.0
ArKit XR Plugin -> preview.5 - 2.1.0
ArKit Face Tracking -> preview.6 - 1.0.0
Switch the build target to Android / iOS. Go to File > Build Settings. We should select the right environment for our build. From the list on the left, click either on Android or iOS. You should see a “Switch Platform” button on the bottom. Click on it. It will take a while for your system to convert your project into corresponding platform. Don’t close this window yet. Click on Player Settings. This will open a window with specific settings for your platform. The template should come with all the settings are done, but you should change the package name of your project.
In Player Settings, find Identification part. Change your package name to something you like. The name should be in the format “com.packagename.projectname”, for example the template should already have “com.virtualxdesign.artemplate”. Change it to “com.virtualxdesign.yourprojectname”. This will allow your app to have a unique identifier.
Let’s look at the Unity project file. When you open our scene you will see a window like the one below:
On the left, we have our Hierarchy. We will be using this window to place our models into our scene. Note that you can place objects under each other. You will see an arrow next the object name when there are child objects under. The center screen is a 3D scene viewer. You can select objects and move them around, rotate and scale just like any other 3D modeling software. For Image Tracking example we won’t be using this window. On the right, you will see Inspector Window. This window allows you to see details of your game objects and edit them. Finally the bottom section is your Project Directory. All of your project files are there. We will be placing our models here.
Let’s open our Image Tracking sample. From your project directory navigate to Scenes/ImageTracking/ImageTracking.Unity. This will bring up our first template scene.
This is a scene that allows you to place your model on to a target image, such as a postcard or a poster. We test our setup with the default settings in this scene. For now you don’t have to change anything. We will build our application and upload it to our device and see if it works. At this point everything should be ready except platform specific ones.
In the next part we will go through steps for preparing your Android and iOS devices. Follow specific instructions for your device.
Build Process (iOS)
Building your Unity project for iOS has some intricate steps. Here we provide the official Unity Tutorial for testing your app on your iOS app. Follow the instructions at the link below, and you should be all set to begin editing the content. You will need:
An iPhone / iOS device with at least iOS 11
Latest XCode
Your Apple Id.
Note: Following tutorial uses a sample app. You don’t need it because you will use the provided template. Also, we have covered some of the steps here. Do not repeat them. Specifically, while following the official tutorial, please note the following:
SKIP “Setting up the Simple Mobile Placeholder project”
SKIP “Preparing your Unity project for building to iOS”
With these in mind, please follow the tutorial at this link: Building your Unity project for testing on iOS devices
Hopefully, after following the steps you should have your app installed on your device. Launch the app, and point your camera to one of the images under “ImageTracking>Images” folder. You should see the template model appear on the image. You may skip to Importing your Model to Unity section.
(Optional) Open the Plane Tracking sample from “Scenes/PlaneTracking.Unity”. Build and Run. When your application is running, move your camera around horizontal surfaces. You will see a grid appear. Click on the grid. Your model should now appear on the grid. You can move your model, scale and rotate it with the sliders.
Build Process (Android)
Building your project for Android is relatively easier. You will need an Android device with at least Android 7.0 installed.
You should enable the developer mode on your device. From Settings> About Phone, find Build Number. TAP ON THE BUILD NUMBER 7 TIMES. You should see a prompt that you are now in developer mode. This enables Developer Options on your phone.
After enabling developer mode, go to Settings > System > Advanced > Developer Options. Note: Developer options might be in a slightly different location for your device. If you cannot locate the developer options, search online.
In Developer Options Find USB Debugging and Enable it. This will allow us to upload an application from Unity to the device.
Connect your device to your computer. Your device should prompt “Trust this computer”. Click “Always Trust” and confirm. If you don’t trust the computer, your computer will not be able to upload your application to your phone.
Now you are ready to build your application. Go to Build Settings. You should already be in Android Platform. In the Build Settings, find Run Device setting. Click on Refresh. From the drop down, find your device name and select. This will make your device the build target.
Click Build and Run. Unity will ask you to save the application on your computer before proceeding. The default location should be fine. Name your app and save it. The build process now should start.
You will have your application loaded on your phone and automatically launched. Point your camera to one of the images under “Scenes/ImageTracking/Images”. You may need to locate the image file on your system and open it. You should see the castle model appear on the image. In the next section you will learn how to import your own model into the project.
(Optional) Open the Plane Tracking sample from “Scenes/PlaneTracking.Unity”. Build and Run. When your application is running, move your camera around horizontal surfaces. You will see a grid appear. Click on the grid. Your model should now appear on the grid. You can move your model, scale and rotate it with the sliders.
After launching your app on your device, open one of the target imags and point your device to it. The Castle model should appear on the target. You may also expand this image and use it as a target.
Importing and Preparing 3D Models.
This tutorial assumes you have an OBJ or FBX file from photgrammetry. Ideally you should export your model with its Pivot centered on (0,0,0) and rotated upwards on Y axis. It is much easier to prepare your model in this way in a 3D modeling software instead of Unity. If your model is displaced or oriented incorrectly, you will need to adjust it in Unity.
3D photogrammetry models have realistic textures on them with environmental light naturally applied. Therefore, it is better not to apply additional lighting on them, but instead use an “unlit” material. Follow the steps below to import your model and apply an unlit shader.
1.Drag and drop your OBJ, MTL and JPG files to your Project Directory in Unity. You may create a new folder under 3D Models and place your model files there.
Drag&Drop your files from system folders to Unity Project Directory.
2.Click on the OBJ file. Under Inspector View, click on Extract Materials. Leave the selected folder unchanged This will cause unity to generate a Material Asset that you can edit in the same directory.
3. Click on the newly created Material Asset. On the Inspector View click on the Shader Drop Down, and type “Unlit”. Click on the Unlit (Mobile/Unlit) shader.

4. Now, we will place our model in to the template scenes. For this purpose, we provide you a template prefab to place and scale your models correctly. In Project Directory, navigate to “3D Models” There is a prefab named TrackedModel.prefab. Double click to open it.

5. Tracked Model prefab is already placed in both Image Tracking and Plane Tracking samples. When you change this prefab, both examples will be updated. So all you need to is place your model in this prefab and you are done!
6. Drag and Drop your model in the prefab. Make sure you place your model as a child of TrackedModel.
7. At this point, you have both the reference model (castle) and your own model in the same prefab. We are going to delete the original castle model soon, but first we need to make sure our model is placed and oriented correctly. Use the castle model as a reference when placing your own model.
8. When you place your own model under Tracked Model, you may mistakenly place it under “castle”. In that case your model may adopt wrong parameters for scale, position and rotation and end up completely off screen. You can use both Inspector View and 3D orbit tools to locate your model and move it back to where it was. IMPORTANT!: Make sure you select your own model when editing transform and NOT the TrackedModel. If you move or scale Tracked Model you will break the sample scenes. For reference, when you click Tracked Model (the root object), you should see following parameters, always:
9. Move, scale and rotate the model so that it centers the castle model. They should align at the bottom. Finally delete “Castle” model. Click on the back arrow to go back to the main scene.
10. Your model is ready! You can already try your app by opening either of the samples and clicking Build and Run. Follow the next section to add your own images to image targets.
Using Image Tracking Template
We provided you with a sample set of image targets. You may want to make your own image target and use it instead.
Find a good target image. As a general principal you should use complex images with many distinct features. Images with little or repetitive features are not good candidates. Check out the provided samples to better understand how your target image should be. You can also read the following link that provides good tips to pick the right target. https://developers.google.com/ar/develop/java/augmented-images/
In your Project Directory, navigate to Scenes/ ImageTraking/Images. Drag & Drop your target image file (.jpg / .png) to this directory.
Click On “ReferenceImagesLibrary.asset”. In the inspector you will a set of images added to our target images list. Any image included in this list will be tracked during runtime. Down the list Click On Add Image.
You will see a new reference image is added. Drag and Drop your image to this newly created reference image. It will add your image to the list.
Under the Specify Size section, enter real world dimensions of your target image in meters.
Adding a new image to target images.
You are all set! Now if you build the Image Tracking sample, you will see that the application recognizes your target image and places the model on it. You can try different images and dimensions to experiment with it.
Using Plane Detection Template
You can also use the Plane Tracking sample. Plane Tracking sample has a UI, which lets you place your model on any horizontal surface. You can move the model, scale and rotate it using the sliders.
In your project directory, navigate to Scenes. Click on Plane Tracking. Everything should already be set. Build and Run the application following specific instructions for your Android /iOS device.
Do not forget to tap on a surface to initially place your model. You will see a grid on surfaces when your phone recognizes them. You can place your model on identified grids.